Protect What Matters Most
Home Inventory Best Practices
You already pay for insurance. Now make sure it works when you need it.
PropertyHero helps you create a comprehensive, well-documented inventory that can make the difference between a rejected claim and full reimbursement.
It takes less than an hour to protect everything you’ve worked for.
-
Get StartedGet Started
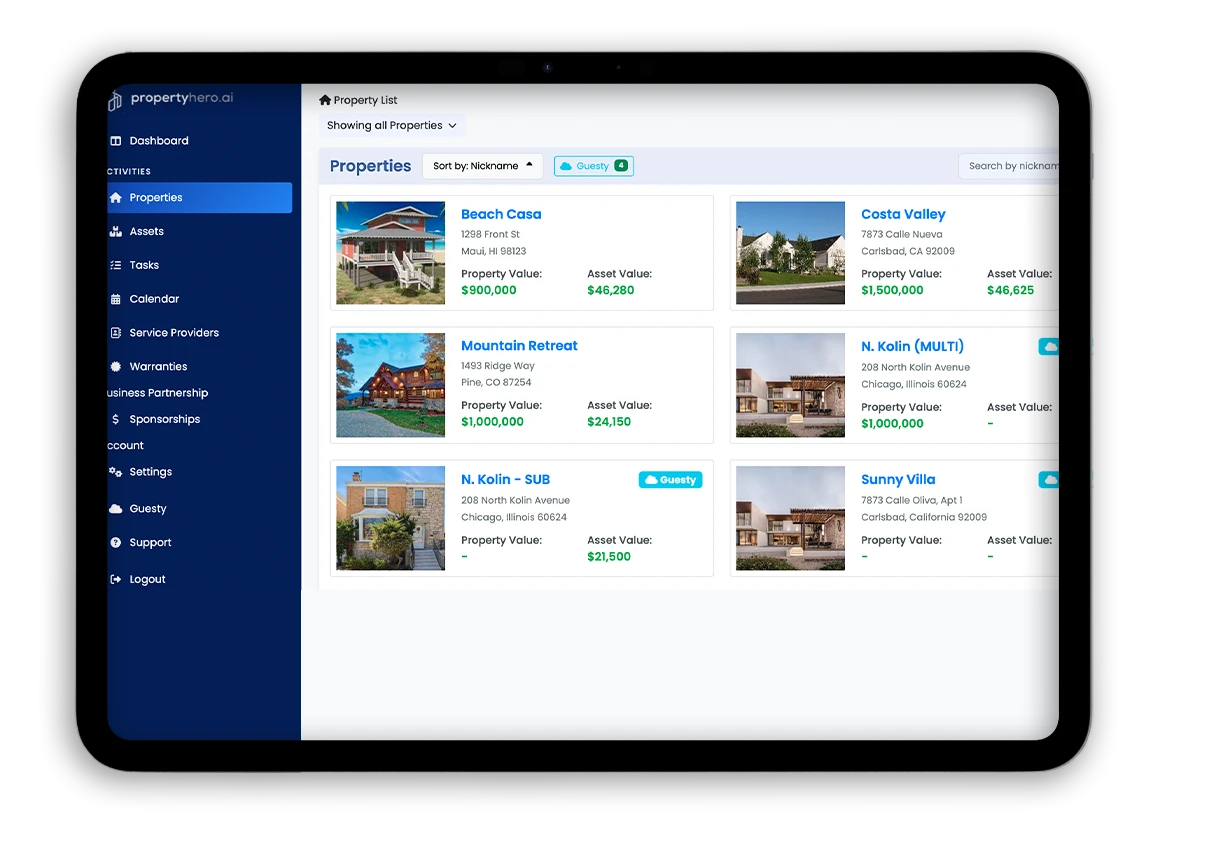
Step 1: Add Your Properties
Start in the Sidebar → Properties section. Each “Property” is a real-world location you want to track—your home, rental, second property, or vacation retreat.
From this view, you can:
- Use the ➕ button to add a new Property
- Set the nickname (e.g., Main Street Home, Beach Rental)
- Enter key data like purchase cost, current value, mortgage, and insurance company
- Upload a property photo
- Pro tip: Monitor property equity and asset value via the Dashboard → Smartview
✅ Tip: If you’re a short-term rental host using Guesty, your connected properties will be marked with a Guesty badge for seamless integration.
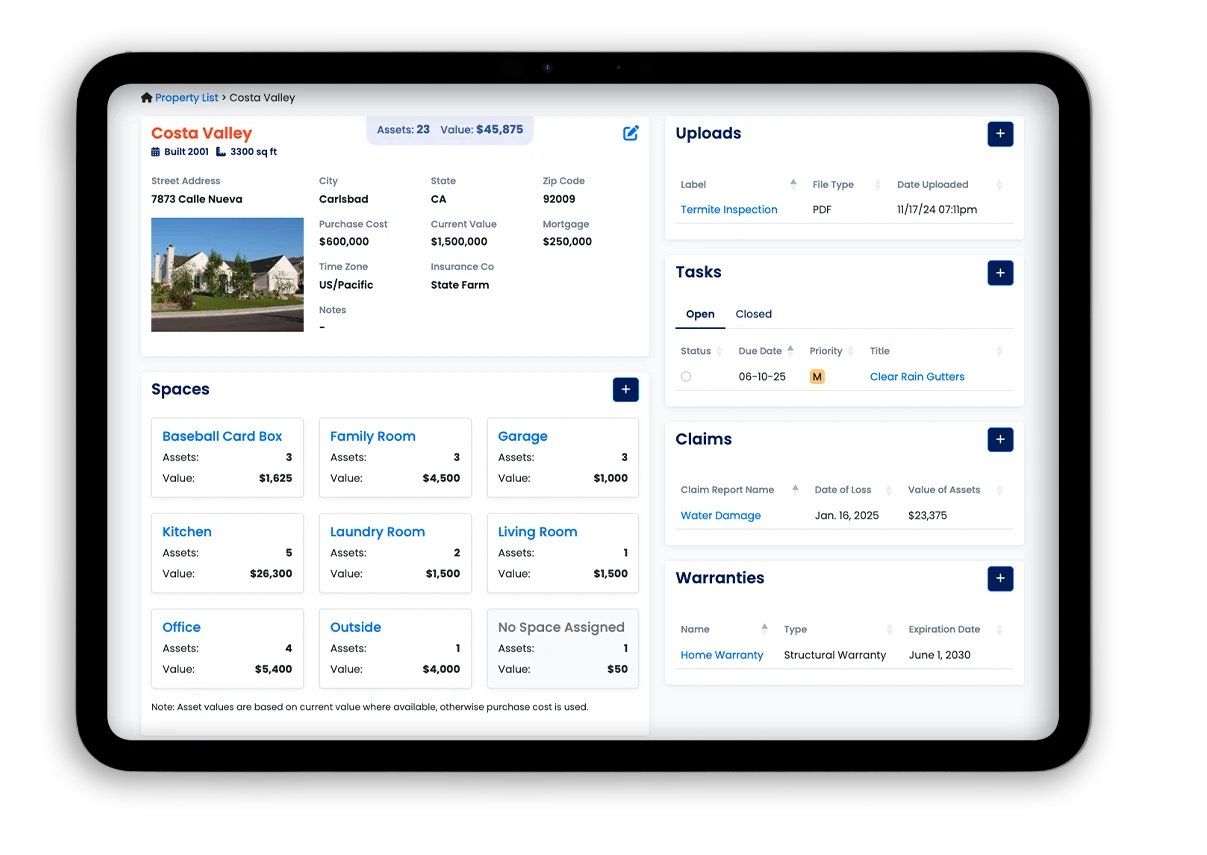
Step 2: Define Spaces (Rooms) Within the Property
Click on any property to access its detail view, then scroll to the Spaces section to add rooms or areas of your home.
These could include:
- Common rooms (Kitchen, Living Room, Garage)
- Specialized rooms (Wine Cellar, Media Room, Home Gym)
- Catch-all or nontraditional areas (Closet, Storage Box, Card Collection Box)
✅ Best Practice: Label every significant space so you can categorize assets clearly—this greatly helps adjusters and keeps your inventory intuitive.
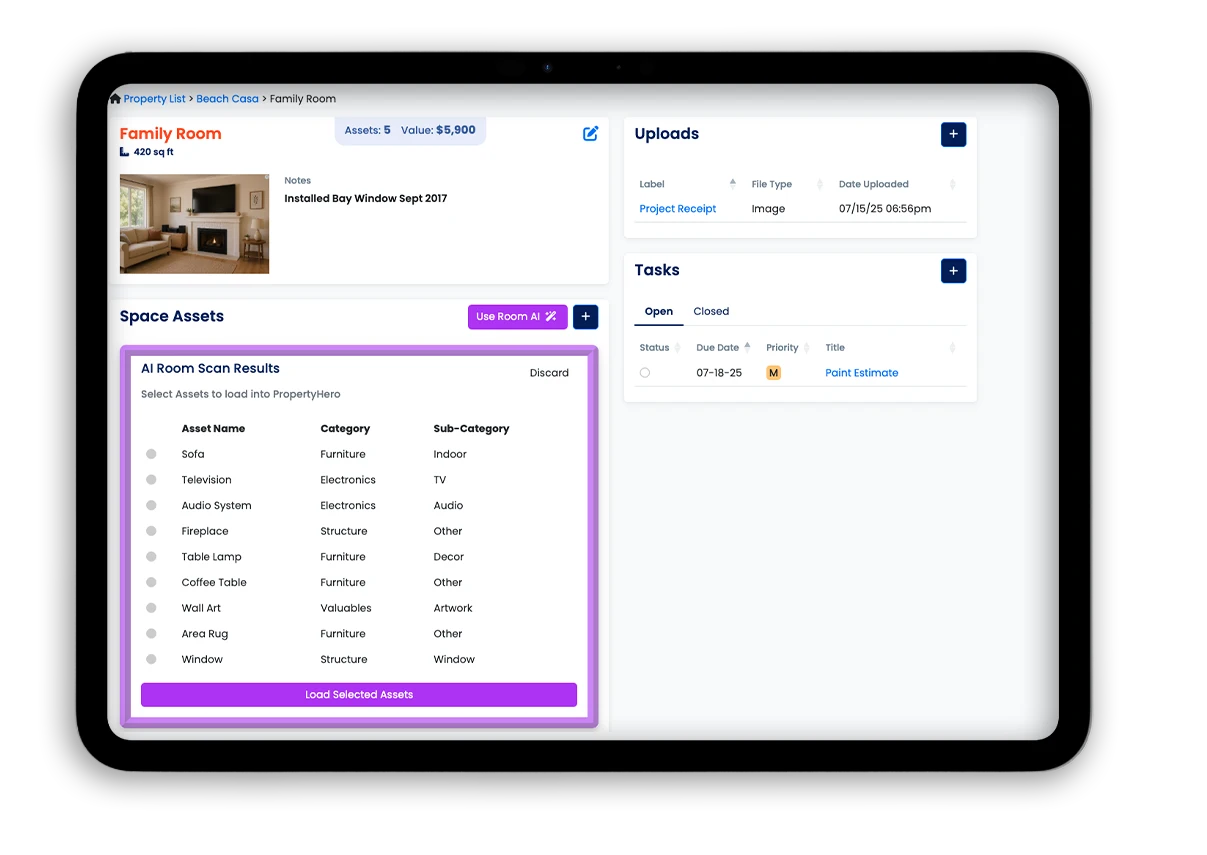
Step 3: Add Assets Using Room Scan AI or Manual Entry
Once inside a Space, you have two powerful options for adding assets:
-
Use “Room Scan AI”
Upload a photo of the room, and our AI will detect and catalog common items—TVs, sofas, chairs, lamps, etc., auto-filling asset entries with nicknames and suggested categories. -
Use the “+” Button for Manual Entry
- Adding from within a Space view will auto-fill the property and space fields.
- You can enter details like asset nickname, category, brand, model, purchase date, and value.
- Upload clear photos and supporting documents like receipts or warranties.
- Pro-tip: Use the ‘Add details with AI’ button from the Asset detail screen to auto-fill asset details like brand, model, and serial number. Submit a picture of the label that is on many common assets, such as electronics, appliances, clothing, etc.
✅ Best Practice: Even if you’re entering something general (like wardrobe items), be descriptive:
- Create an asset called “Skirts” and describe in the Note field: “8 designer skirts, mostly Ann Taylor and Nordstrom brands”
- Upload photos of all 8 skirts as visual documentation.
- Visual proof is critical. If you ever need to file a claim, photos and details speed up adjuster validation and payout.
Step 4: Assign Tasks for Maintenance and Tracking
Tasks can be associated with a property, asset, or claim. To add a task:
- Navigate to the specific object (e.g., a property, space, asset, or claim)
- Use the “+” button in the right-hand “Tasks” card
Tasks can be used for:
- Maintenance reminders (e.g., Clean gutters, Annual HVAC check)
- Claims follow-ups
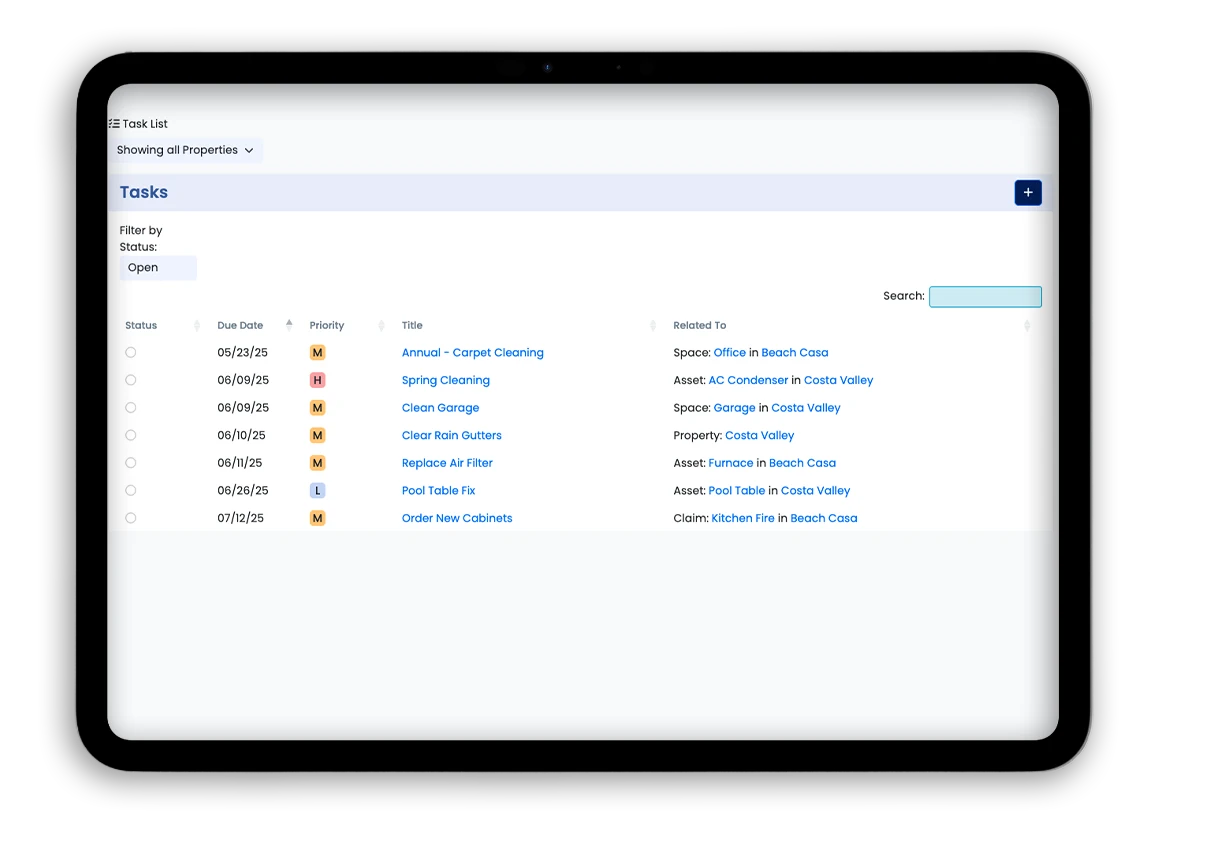
Tasks appear in your:
- Dashboard – Tasks card
- Tasks listing screen
- Calendar view (if you denote for the Task to appear on Calendar)
- Property, Space, Asset or Claim detail view – side sub-listing card
✅ Tip: Use recurring tasks for ongoing documentation or seasonal upkeep.
Step 5: Upload Receipts, Appraisals & Supporting Docs
For any property, space, asset, or claim, use the Uploads panel (right side of the detail view) to attach important documentation:
- Receipts (PDFs or images)
- Damage photos
- Warranty files
- Appraisals
- Inspection reports
✅ Best Practice: Label uploads clearly (“Receipt – Samsung 55" TV”, “Appraisal – Diamond Necklace”). Use PDFs or high-quality images. All uploads are automatically date-stamped.

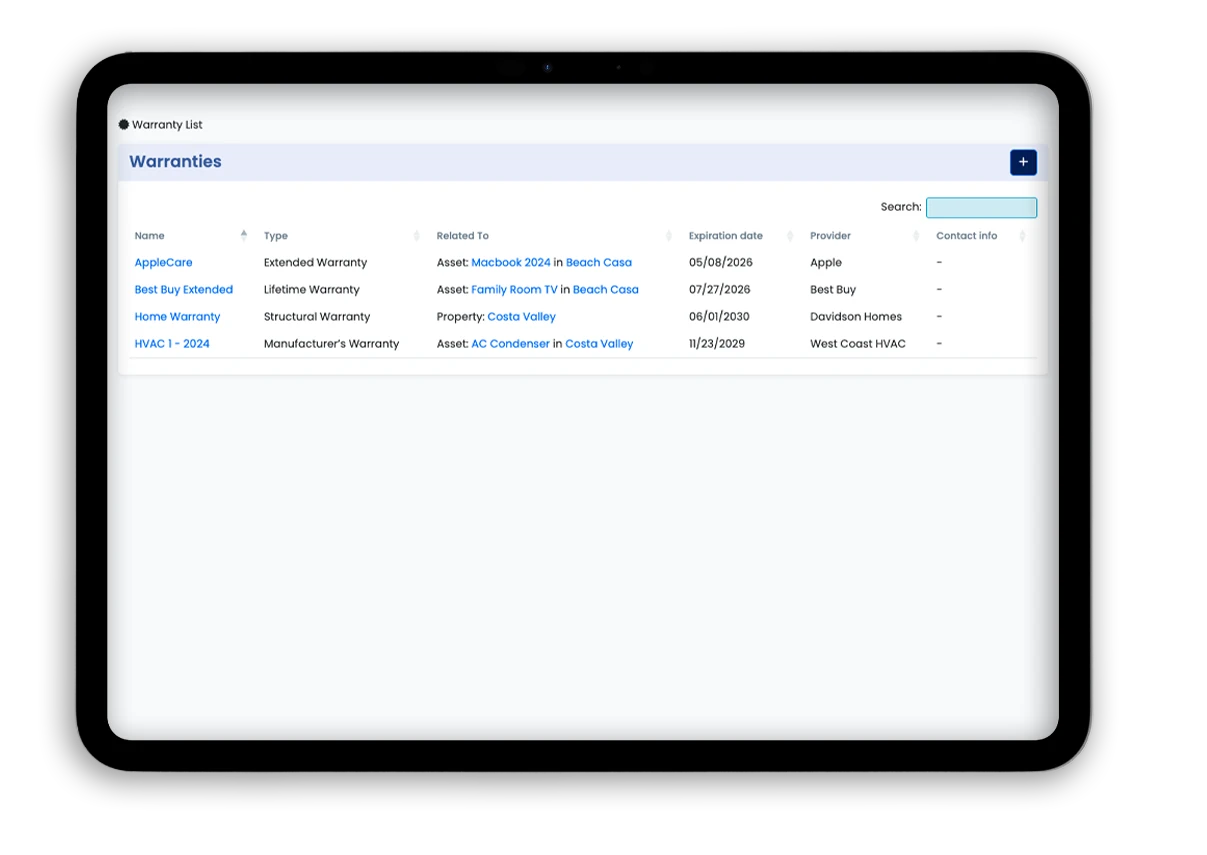
Step 6: Register Warranties
Track active warranties under Sidebar → Warranties, or from within individual asset or property pages.
You can:
- Add warranty names (e.g., Home Warranty, GE Fridge Extended Plan)
- Record warranty type and expiration date
- Upload PDF copies
✅ Best Practice:
- Track major system warranties (HVAC, roof) and individual electronics, appliances, and furniture warranties. (This saves time during service calls and claims.)
- Also, remember to record any maintenance tasks associated with the warranty. (Many warranties may become void if proper maintenance is not performed.)
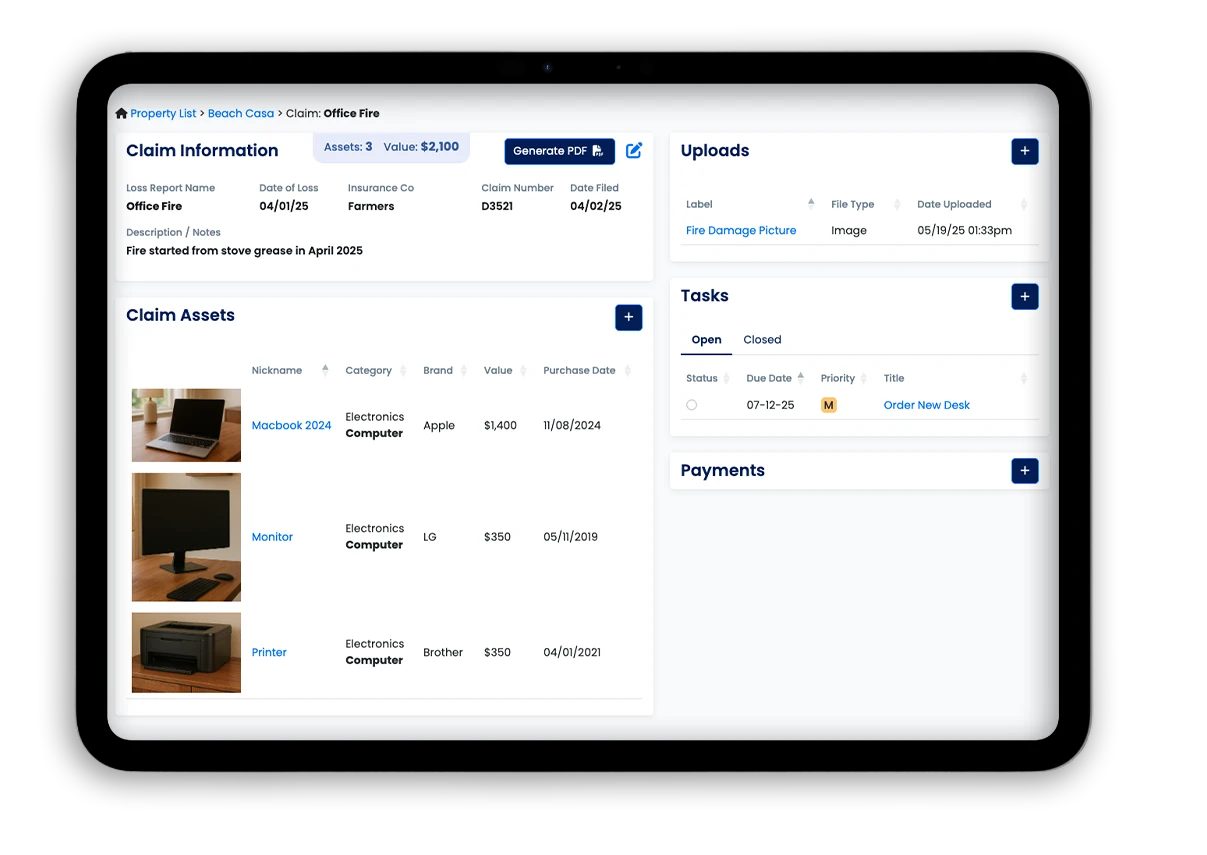
Step 7: File and Manage Insurance Claims
If something goes wrong—fire, flood, theft—you’ll be ready. Click into the affected Property, then go to the Claims section and tap “+” to start a new claim.
Enter:
- Loss type, date, insurance company, claim number
- A description of the incident
- Upload photos of the damage
- Select impacted assets from your inventory
You’ll be able to:
- Track the value of damaged assets
- See all related uploads, payments, and tasks
- Generate a claim PDF report with a single click
✅ Best Practice: Use before-and-after photos, detailed notes, and accurate asset values to accelerate the adjuster review process.